Showing posts with the label how toShow all
Budget-wise Birthday Invitation
How to Transform Silhouette Image into Custom Shapes Using Photoshop CS5
7 Steps Doodling Lion’s Face Out from a Rectangle
10 Amazing Photoshop Tutorials | My Choice
Stretch Me This Way | Silkscreen Tutorial
CMYK Pattern for T-shirt Printing Using Photoshop
Load More That is All

19.1.17

Budget-wise Birthday Invitation

Spending money on foods, entertainment and party favors is unavoidable to ensure you throw the memorable party for your love ones.

But there’s a lot of ways on how to cut too much expenses for your kid’s birthday party preparation. And knowing a way of doing it without affecting the quality of your theme presentation is a big advantage.


To help you about it, here’s an editable budget-wise birthday invitation in PSD format which only cost a 4 inch x 6 inch size photo paper, a printer and a little knowledge in Photoshop CS6 application. A cheap yet cute birthday invitation will be yours without spending another cash for layout.  

Don't forget to share and leave comments. 


25.5.12

How to Transform Silhouette Image into Custom Shapes Using Photoshop CS5

Do you want to use an image file as your Custom Shape in Photoshop CS5 but don’t know how to do it?  Stop worrying now, this tutorial is intended for you.

What is CSH file extension?


The CSH file extension is associated with Adobe Photoshop, a professional image-editing standard and leader of the Photoshop digital imaging line, developed by Adobe Systems Incorporated.

CSH files are used for custom vector shapes (objects), such as logo of a sexy lady for a magazine cover and can be saved and loaded in Adobe Photoshop.


Custom shape files are saved in Photoshop/Presets/Custom Shapes folder by default.

By default, Custom Shape Tool is under the Rectangle Tool
Just right-click the icon and select Custom Shape Tool

The shape tools provide an easy way to create buttons, navigation bars, and other items used on web pages.

1. Open a new blank Photoshop document by clicking File menu at the top left corner of the screen and choose New. This brings up the New Document dialog box. Set your document as follows: 3 inches width and 3 inches height (3x3), 300 resolutions. 
Opening a New File in File Menu
Resetting image size and resolution
2. Locate your source image and import it on Photoshop CS5 or use drag & drop command.

3. To transform your silhouette image as a Custom Shape, first ensure that the silhouette image’s layer is selected in the Layers palette. The preview icon will be highlighted once selected. Right-click your image layer icon in the Layers palette and click Layer From Background.
Layering the silhouette image from background.

4. Once clicked, the pop-up window will appear. Rename your file and hit OK
Renaming the image.
5. Using rectangular marquee tool (shortcut: M), select a little portion of the white area by   long pressing the left button dragging your mouse. 
Selecting the white background using rectangular marquee tool.
Open Select menu at the top of the screen and click Similar. This will select all the white space in our image.

6. Press Delete button. This will reveal our image in a transparent background.
Deleting the white background.
7. Select the image using Wand Tool.
Selecting the image using Magic Wand Tool.
8. Right-click the selected image and click Make Work Path
Converting the image file into a work path.
Setting the Tolerance in 1.0 pixels.
8. Set the Work Path Tolerance in 1.0 pixels. 


9. Clicking Edit menu at the top left corner of the screen and choose Define Custom Shape, renaming it, and it's done. You have now your very owned Custom Shapes for Photoshop.


Renaming the shape.
Click the link below for the Custom Shapes I've done so far. Go on... it's for FREE.


How to use

1. Expand the Custom Shape tool by clicking the down arrow.

2. Click the small right arrow icon.

3. Click Load Shapes and locate the csh file you've downloaded, extract it and click OK button.


25.4.12

7 Steps Doodling Lion’s Face Out from a Rectangle


I'm having problem with my laptop last night and I have no other choice but to clean it up and reformatting the hard drive. Doing this technically consumes patience. Since I started late at night, I finished by 3 o'clock in the morning. And to avoid  getting stress, I took my drawing pad and pencil and do the doodle. 

What is a doodle?
A doodle is an unfocused drawing made while a person's attention is otherwise occupied. Doodles are simple drawings that can have concrete representational meaning or may just be abstract shapes.


Stereotypical examples of doodling are found in school notebooks, often in the margins, drawn by students daydreaming or losing interest during class. Other common examples of doodling are produced during long telephone conversations if a pen and paper are available.

Popular kinds of doodles include cartoon versions of teachers or companions in a school, famous TV or comic characters, invented fictional beings, landscapes, geometric shapes and patterns, textures, banners with legends, and animations made by drawing a scene sequence in various pages of a book or notebook.

Okay, wanna know some steps how to start doing a doodle? Just follow these simple seven steps on doodling a lion's face out from a rectangle. 

Here's my doodle steps done with Photoshop just to make it easier for you to follow.


 1. Draw a rectangle. 


2. Add a triangle at the bottom part inside the rectangle. 

3. Draw a small triangle vertically-flipped pointing the big triangle and connect the two triangle with a line. Then draw a small isosceles trapezoid just above touching our small flipped triangle. 

4. Now add zigzag pattern inside of the big triangle for the teeth. 

5. Let’s add the lion’s eyes, ears and jaw. WOW! Our lion’s face now looks splendid. 

6. Eight whiskers will make our lion’s face great! 

7. Be a child, do the scribble! Create the mane. Do it around, circling our lion’s face. Add some fun on it and don’t stop until you satisfied on what you've done. 

Don’t bother how it ends; the important is… you’re relieved being stress out and you are having FUN!

DONE! ^^

DID YOU KNOW:

The doodle designed by Larry Page and Sergey Brin of 1998 was the first Google Doodle, in honor of the Burning Man Festival. They made it to notify users of their absence in case the servers crashed. And then there was Dennis Hwang who designed the logo for Bastille Day in 2000 and  many other Google Doodles until now. 

By clicking on a Google Doodle, you will directed to a string of Google search  where you can see the results about the topic.

But my most favorite Google Doodle was the Pac-Man interactive logo, shown in May 21, 2010, in commemorating the 30th anniversary of the arcade game Pac-Man. And it was the first interactive logo, created in association with Namco. 

Wanna play Pac-Man? click this link: Google Pac-Man site. You can also visit the Google Archive to see hundreds of doodles Google created.


18.4.12

10 Amazing Photoshop Tutorials | My Choice

These are my collections of the most interesting and amazing Photoshop tutorials. In this collection, be inspire with these 10 various tutorials as your references upon doing your own artworks. Enjoy!

Creating an Abstract Watercolor Wallpaper
by: 10 Steps


How to Create a Realistic IES Lighting Effect in Photoshop

How to Create Stunning and Bold 3D Text 
by Six Revisions

Create a Shiny Earth with Photoshop 3D Layers 
by Psdtuts+


How to Create a Vintage Radio Poster in Photoshopby Adobetutorialz


Manipulate Smoke to Create Hyper-Real Images 
by Psdtuts+


Create Vintage Traveler Diary in Photoshop
by Abduzeedo


How to Create a Hellacious Flaming Skull in Photoshop
by Psdtuts+

Create a Stunning Text on Wild Fire Effect 
by 10Steps

How To Create An Abstract Floral Explosion in Photoshop 


4.4.12

Stretch Me This Way | Silkscreen Tutorial


Lesson #2:

Make your own silkscreen frame by simply following these steps below.
The instructions are the same as any How to Make Silk Screen Frame Tutorials, I simply add a little bit of idea I've learned that I guess may help you out on how to stretch the organza much more easier than the usual pulling.^^


We need 2-inch x 2-inch wood, saw, hammer, nails or screws, gun tacker, organza/synthetic screen mesh, scissors, masking tape and hand sprayer for this project.  

Instructions:

1. Cut two 30-cm lengths of 5-cm by 5-cm (2" x 2") wood  and 40-cm lengths of 5-cm by 5-cm (2" x 2") using a saw. Build a square frame with the wood using nails or screws. 


2. Sand every sharp corners or edges of the frame where the grooves meet up to make it smooth and to protect the fabric.


3. If your pattern is for long lasting use, coat it with polyurethane finish to seal and protect the wood.


4. Prepare your organza/synthetic screen mesh, by using your gun tacker (you can use regular stapler). Staple the synthetic mesh along one side of the frame. Wet the organza using a hand sprayer. This will help you stretching the synthetic screen mesh easier. Then staple on the opposite side of the frame in the same manner. Proceed on to staple the remaining two sides.


5. Wipe it with dry cloth or put it under the sun to dry. Remove the excess fabric with scissors. Then sealed each sides with masking tape. 


And we're done. It is so easy, you can even do it alone.

READ Lesson #3: Lay-outing and Color Separation


3.4.12

CMYK Pattern for T-shirt Printing Using Photoshop


Lesson # 3
Tomorrow will be Holy Week Day Four – Silent Wednesday. It was Scholars speculations that Jesus and his disciples spent this day resting in Bethany in expectation of the Passover.  Bethany is the place where Jesus Christ raises Lazarus from the dead.


Remembering Holy Week & my work
It reminds me of the time when I was still in the Philippines and managing my Art and Sign shop when Holy Week comes. I marked it as one of the busiest months in the Philippine calendar. Since more than 85 percent of the Philippine population is Roman Catholic, you will expect the whole nation are observing and mostly participating the event. Just like in our municipality, 90 percent are Catholic devotees that gathered every Lenten. And aside from candles, rosaries and any religious artifacts, T-shirt printing was also in demand on that day.  Religious group are mostly the customers we encountered the whole month or even before that month. Some of them brought sketches and samples of their group logos for T-shirt printing design.

And I hate deadlines. So, additional manpower was needed and spending extra time to finish everything before Wednesday ends. Because everyone need to spend a day for resting and commemorating the sacrifices Jesus Christ had given us to be saved. 
-----------------------------------------------------
Preconcept design
Preconcept is a rudimentary idea intermediate between an ordinary precept and a fully developed concept.
The problem with preconcept designs is redoing the layout that consumes additional time. You can ask additional charge for the job anyway.

Color Separation using Photoshop
With Photoshop, making pattern for t-shirt printing becomes easier.  
Let me share with you my knowledge about doing the step-by-step procedures on Color Separation using Photoshop which I guess all layout artists of the best t-shirt printing companies also did. Even the known Printing Companies use this methods before feeding it  to their Automatic Silk Screen Printing Machine.   

1.       After carefully enhancing your design in RGB (Red, Green and Blue) mode, convert it to CMYK mode (Cyan, Magenta, Yellow, BlackK is used instead of B, so that it does not get confused with Blue) for process-color offset printing.


2.       Open Filter / Pixelate / Halftone. Just leave the default setting:  (Max. Radius: 8 / Channel 1: 108 / Channel 2: 162 / Channel 3: 90 and Channel 4: 45.) Then press OK. Wait till color halftone processing finished. Take note: If the output is larger dots or smaller dots than the desired result, adjust your image size first before applying the halftone effect.


3.       This will be the result.


4.       Click Channels at the palette menus (located at the right side of PSD workspace), select only one channel per print.  Prepare it for printing.


These images below shows the dotted pattern. It was my intention to select two channels for the first 3 images to emphasize the colors (Please refer to step #4 for the printing matters).
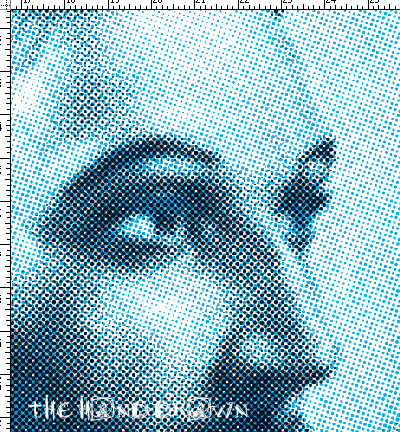
Color Halftone | Cyan + Black
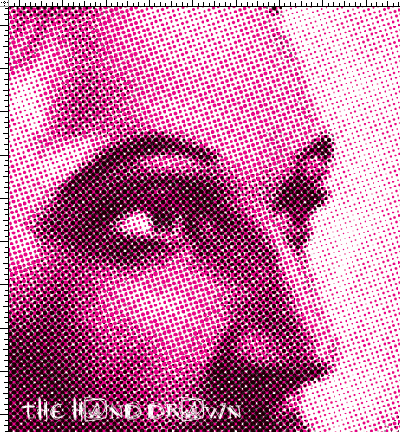
Color Halftone | Magenta+ Black
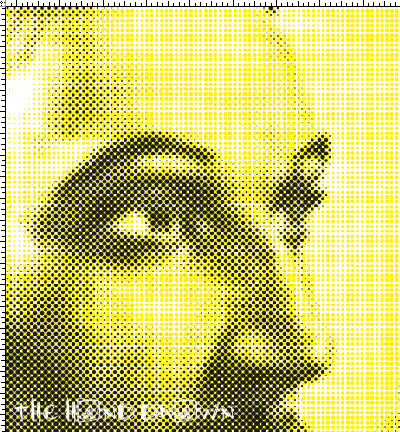
Color Halftone | Yellow+ Black
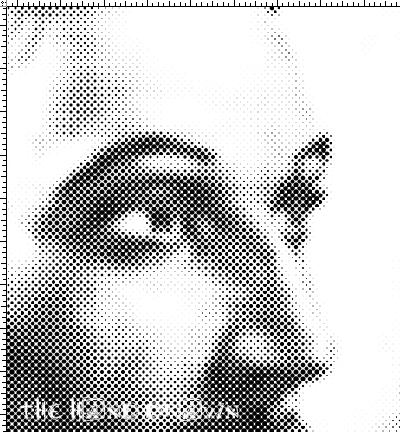
Color Halftone | Black

5.       Setup your printer. Make it sure to set your printer into grayscale printing. 
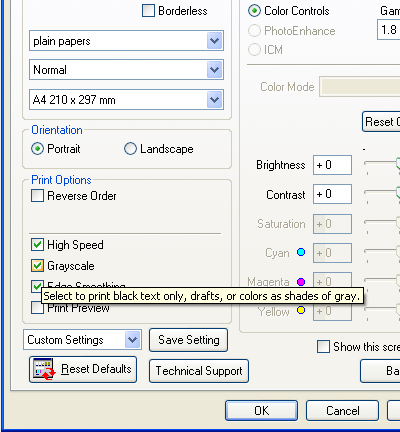
This Grayscale setting will depends on  your printer options. 

 Now we are ready to print our pattern per color.


----------------------------------------------------- 

As GOD's servants, let us allocate time to worship Him not only during Holy Week but the entire days of our lives.  I want to leave this verses of what Bible says about having a busy life. GOD bless us all.


"Do not be anxious about anything, but in everything by prayer and supplication with thanksgiving let your requests be made known to God. And the peace of God, which surpasses all understanding, will guard your hearts and your minds in Christ Jesus."